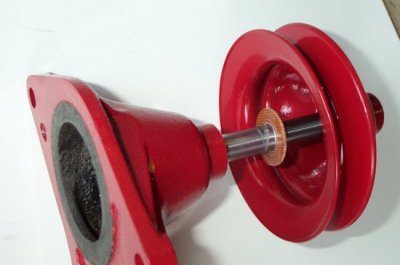
| Exploded view of water pumps; passenger and truck |
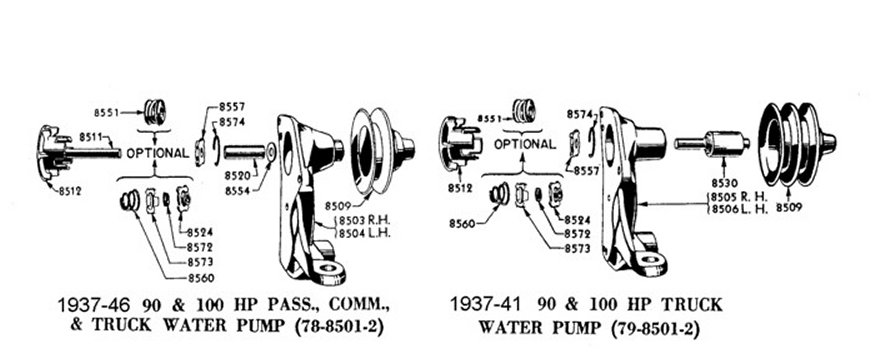 |
There are a number of options available for flathead owners when it comes to waterpumps; new pumps are available from various suppliers, as well as rebuilts. Also "high flow" and ball bearing conversions from a couple of different vendors. And there are new pumps with ball bearings, and even aluminum pumps from Australia. But some of us still are rebuilding their own pumps usings kits available from the flathead parts suppliers. This web article is my experience in rebuilding my pumps.
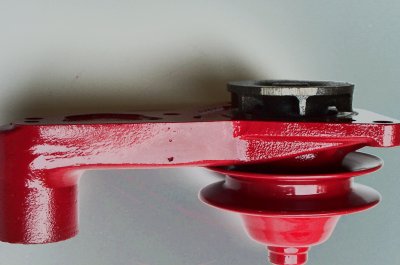
| Exploded view of water pumps; passenger and truck |
|
 |
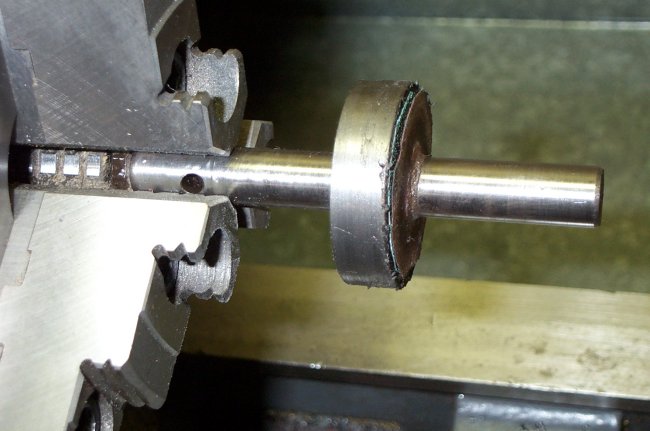
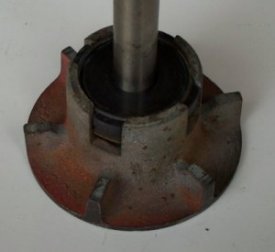
Disassembly The pulley and impeller are a press fit to the shaft and must be pressed off. The pulley is removed first by supporting the pump
housing with clearance below for the impeller and pressing on the shaft at the pulley end. A hydaulic press is best for this but it can be
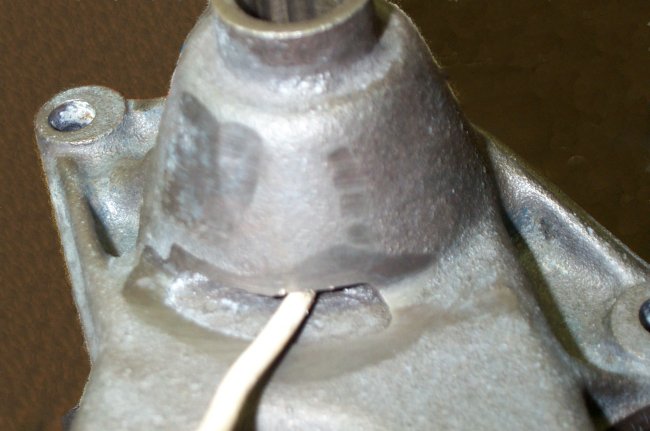
done with a heavy hammer and a drift pin. After the pump is apart the seal surface needs to be inspected for pitting. The seal surface can
be restored by making a tool using the old shaft and a thick washer attached to it with sandpaper or emery cloth glued to it. The washer
could be a shaft collar or a pressed on part. The old impeller might be used by cutting off the tabs used to hold the carbon seal and using
the flat surface that the rubber seal fits against. I found that if I glued a coarse piece of sand paper on first it would hold the finer
pieces on by friction. The final finishing should be done with 320 or 400 grit. Also check the housing for any warping on the surface that
mates with the engine block.
 |
 |
 |
Assembly
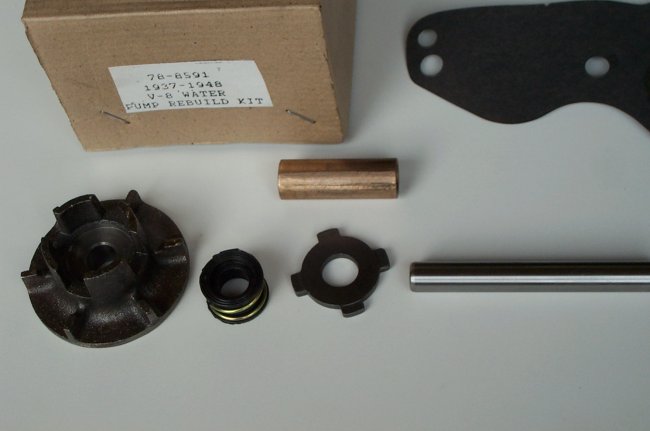
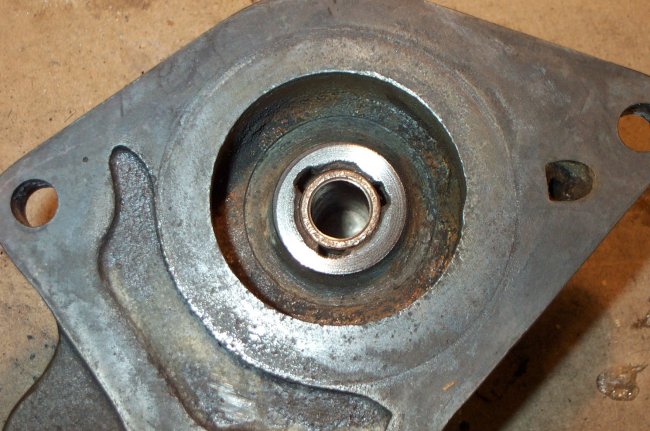
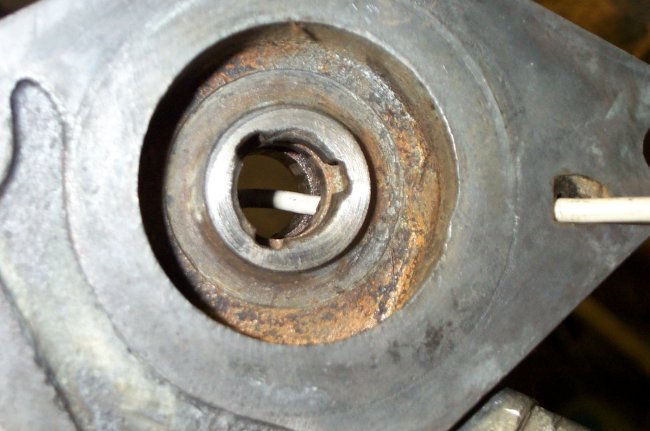
After the seal surface has been restored the old bushing is removed by pressing (or driving) it out. Then the pump body needs to be thoroughly cleaned. The cavity that holds oil that is fed in from the engine and the water passages are probably encrusted with caked oil and rust and some scrapers made from bent heavy wire or similar will help to dislodge it. Once the body is clean the new bushing can be pressed in.
 |
 |
Assembly
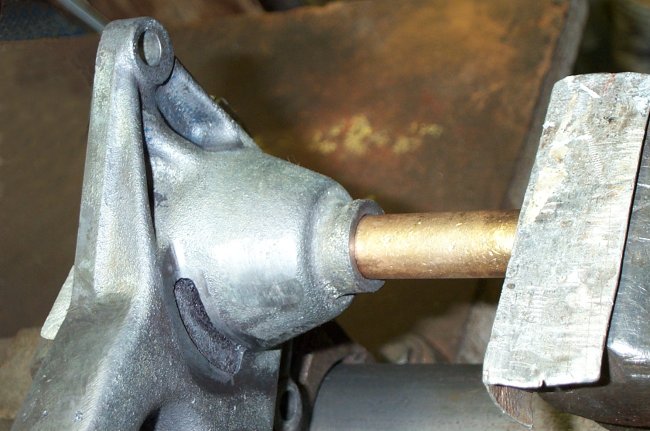
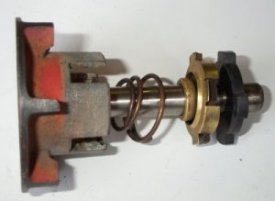
Now the bushing must be reamed to size. When the bushing is manufactured the outside diameter is made for a press fit into its nominal O.D. size which is 11/16" or .6875". The bushings in my kit measured .690" on their O.D. and .501" on the inside diameter. When the bushing is pressed into the housing the I.D. closed up to about.499 which is too tight for the shafts which measured about .4995" give or take a couple of tenths (.4993 to.4997). I reamed them with a 1/2 inch reamer that cuts a hole slightly larger than .500, more like .5002 or .5003. This gave me a nice free fit with aproximately .001" clearance. Be sure you use a reamer that is nice and sharp; a dull reamer will "smear" the I.D. of the sintered bushing and close up the tiny gaps which will prevent the oil from flowing out of the porous walls to lubricate the shaft. Now the pulley is pressed onto the new shaft and the thrust washer is installed on the shaft with a little grease. The shaft is oiled and slid into the bushing. The carbon seal, and the rubber bellows are placed on the shaft at the back of the pump and then the impeller is pressed on. Care must be taken here to line up the tabs on the carbon seal to the fingers on the impeller. After the impeller is started on the shaft you can line them up and push the housing against the seal and impeller to keep everything in place while the impeller is pushed the rest of the way on to the shaft. Use a washer about the size of the hub on the impeller so the force is on the hub and not on the outer rim of the impeller to ensure that the cast impeller will not be broken as its being pressed onto the shaft. There should be about 1/16" inch of spring travel left after the impeller is pressed on. Check this free play while pressing the impeller on so you don't go too far and have to start over.
 |
 |
 |
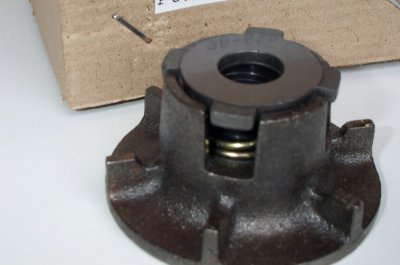
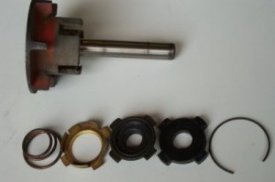
Seal differences
If you look at the exploded parts drawing above it shows two versions of seals. The version on the top looks like what I received and probably the only one available now. One of my old pumps had the other version in it so I cleaned it up and took these photos. The major difference appears to be that on the impeller end it seals to the shaft where the newer versions seal to the surface of the impeller. The impeller used on this other version also has holes around the hub. The newer replacement impellers are solid. I can't think of any reason for the holes. The metal parts on the older seal were all brass, and the spring was non-magnetic, maybe silicon bronze. The spring in the new seal was magnetic, hopefully the plating on it will retard the rust formation. The carbon seal looked the same on both versions but on the old version was held to the impeller with a retaining ring.
 |
 |
 |
 |
Some options
When shopping for kits it looked to me that all the vendors are selling the same parts; at least it appears that way from the ones who have pictures to view. And one vendor I found (Mac's) offers some of the kit parts ala cart. So if you have impellers that are good you can buy the seal # 68-8524 and the bushings # 78-8520 and supply your own shafts. There are suppliers of precision shafting (W.M. Berg and Stock Drive Products are among these). They have cold rolled steel shafting with OD's of .4995 and .4997 and tolerances of +.0000 -.0004 or -.0005. These would probably work out well with the .500 reamers which seem to cut a little oversize. .500 drill rod may be easier to find but the tolerance is usually + or - .001 so you may have to match up a reamer to fit the particular stock. There is stainless steel shafting available too with even closer tolerances but the makers of the sintered or "Oilite" bushings say you must order bushings with special lubricants in them to avoid seizures when using stainless or hard chromed shafts.
Created on ... October 16, 2005